The FAS facial phenotype as defined by the FASD 4-Digit Code is defined by three facial features:
An accurate FASD diagnosis requires accurate measurement of these facial features. These three features can be measured:
|
|||||||||
|
|||||||||
|
|||||||||
|
|||||||||
Copyright: Please do not copy or distribute the material presented below without written permission from Susan (Astley) Hemingway, Ph.D., University of Washington, Seattle WA. astley@uw.edu |
|||||||||
INSTRUCTIONS
|
|||||||||
| Foreword: Obtaining properly aligned photographs does not require a professional photographer or sophisticated equipment. They can be obtained using a hand-held digital camera. The ideal photographer has two qualities: 1) attention to detail, and 2) patience. The secret to obtaining good photos (especially of active toddlers) is to take many photos. Digitial photos are free, thus take as many photos as you need to obtain the quality you are looking for. | |||||||||
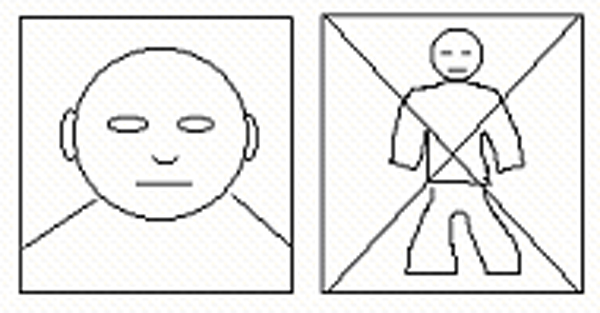
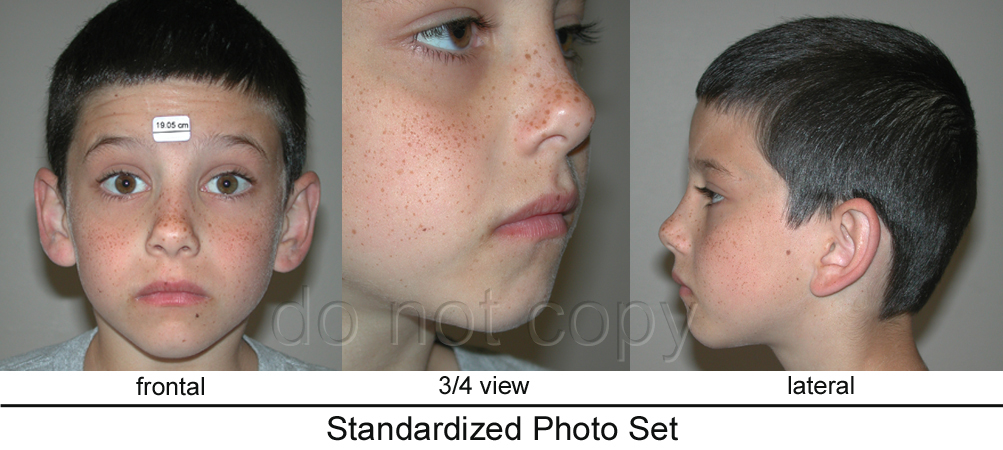
| 1. The goal is to obtain 3 photos of good quality (frontal, 3/4, and lateral). | |||||||||
 |
|||||||||
| 2. Fill the camera frame with the face | |||||||||
d
|
|||||||||
| 3. Animation demonstrating proper alignment of the camera to the patient's face. | |||||||||
|
|||||||||
| 4. The 3/4 inch dot (ruler) must be placed between the eyebrows. | |||||||||
|
|||||||||
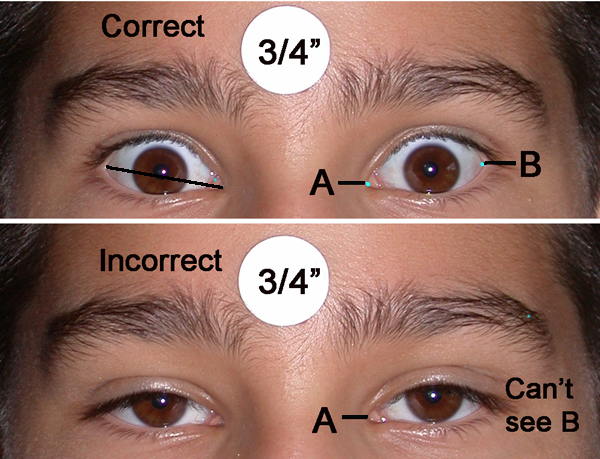
| 5. The eyes must be wide open to see the inner (A) and outer (B) corners of the eye. | |||||||||
|
|||||||||
6. Animation demonstrating the importance of the eye being fully open to obtain an accurate measure of the palpebral fissure length. |
|||||||||
. |
|||||||||
| 7. Estimating the position of the inner corner of the eye (endocanthion) under an epicanthal fold. | |||||||||
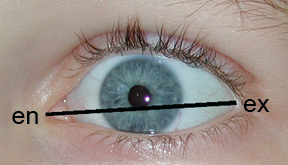 |
The palpebral fissure length is measured from the endocanthion (en) (inner corner of the eye) to the exocanthion (ex) (outer corner of the eye). |
||||||||
|
|
An epicanthal fold (a fold of skin covering the inner corner of the eye) can block the view of the endocanthion (en). The location of the endocanthion (en) under the epicanthal fold can be estimated in a photograph by extending the curvature of the upper and lower eyelids (yellow lines) until they cross. |
||||||||
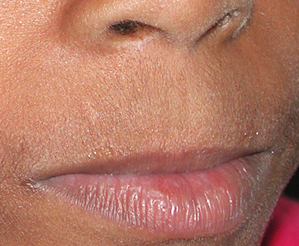
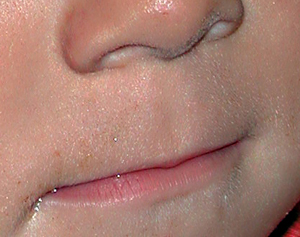
| 8. Lips must be gently closed with no smile. | |||||||||
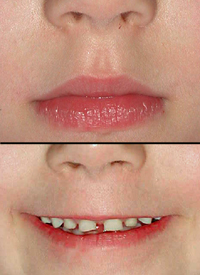 |
Correct
Incorrect |
A smile will distort the soft tissues of the philtrum and upper lip. The photos to the left are the same child The smile incorrectly makes the philtrum appear smoother and the upper lip thinner than they truly are. |
|||||||
| 9. Up or down rotation of the head will cause incorrect measurement of lip thickness. | |||||||||
/>
|
Correct Rotation (Green) When the boy is aligned properly in the frankfort horizontal plane, the correct rank for his lip thickness is Rank 3. His head is rotated properly when the line drawn between his ear canals falls just below his eyes (The line in the animation turns GREEN). Incorrect Rotation (Red) As the boy's head rotates down toward his chest, his upper lip appears thinner than it truly is (Rank 3). When the boy's head rotates up, his upper lip appears thicker than it truly is (Rank 1). Ranks 1 and 3 are incorrect. |
||||||||
| 10. Illustration of correct use of the Lip-Philtrum Guide. | |||||||||
|
|||||||||
| 11. Illustration of how the FAS Facial Software is used to measure lip thinness. | |||||||||
To measure lip thinness using the FAS Facial Software, the User outlines the upper lip with the mouse (see blue lines in animation). The software uses this outline to compute a measure of lip thinness called 'circularity' (perimeter squared / area). The thinner the lip, the bigger the circularity. The Lip Table on the backside of the Lip-Philtrum Guide defines the range of circularity for each of the five Ranks. When the User finishes outlining the upper lip, the software automatically computes the correct Rank for lip thinness. |
|||||||||
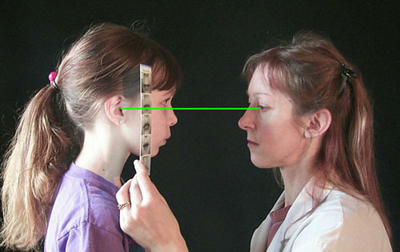
| 12. It is difficult to measure the palpebral fissure length accurately with a ruler. | |||||||||
/> Physician measuring the |
If a ruler is used to measure the palpebral fissure length (PFL), here are tips to improve accuracy.
IMPORTANT: Do not assume your measures with a ruler are accurate. Confirm the accuracy of your technique by measuring a PFL that has been measured with a sliding digital caliper (the gold standard). The FAS Facial Photograhic Analysis Software provides a consistently more accurate measure of the PFL than a ruler. |
||||||||
| 13. The ruler must be placed close to the eye to obtain an accurate measure. | |||||||||
The ruler must be placed sufficiently close to the eye to measure the palpebral fissure length (PFL) accurately. Incorrect Method (RED) If the ruler is held beyond the nasal bridge (bottom image, red arrow) the PFL is incorrectly measured as 2.6 cm (top image, red arrow). A measure of 2.6 cm is 1 standard deviation below the mean for a normal 10-year-old male (red dot). Correct Method (GREEN) When the ruler is placed closer to the eye (without touching the eyelashes) (bottom image, green arrow), the PFL is correctly measured as 2.7 cm (top image, green arrow). A measure of 2.7 cm is near the mean for a 'normal' 10-year-old male (green dot). This 1 mm error from incorrect ruler placement resulted in a normal-sized palpebral fissure being incorrectly recorded as 1 S.D. below the mean. |
|||||||||
| 14. Click here to view instructional photos to correctly identify Rank 4 and 5 philtrums. | |||||||||
|
|||||||||